How to Butcher a Goose
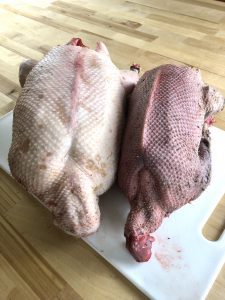
You’ve gone out and gotten yourself a Canada goose. Congratulations! You’ve plucked it, gutted it, and now you’re looking at a nice whole goose. Although it seems like a great idea to roast it, Canada geese are much better separated into pieces which can each be dealt with in their respectively suitable ways. Follow these instructions to part out your goose into breasts, legs, wings, carcass, and extra skin and fat for rendering. Canada geese come in many shapes and sizes and have different characteristics from season to season. They will not always look exactly like the one I am preparing here.* This instructional can also be used for a farmed goose or wild or farmed duck.
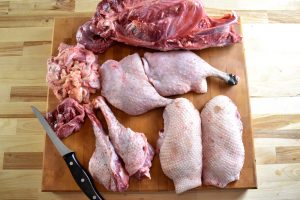
1 Canada Goose
- 2 breasts – good for cooking quickly, keep these at medium-rare to medium, or they will become tough and livery tasting
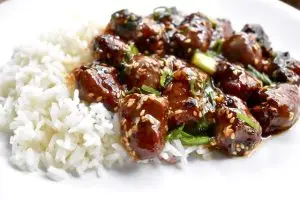
- 2 legs – good for cooking very slowly, turn these into confit, carnitas, cook them in a stew, or put them in the crockpot with bbq sauce or Mexican spices and shred them like pulled pork for buns or tacos
- 2 wings – even tougher than the legs, these guys are good for very slow cooking, like confit, crockpot, or for stock
- Carcass – this should be roasted, then simmered to make a goose stock which can be used for soups, stews, or in place of water when cooking grains like rice or quinoa
- Fat and Skin – This should be rendered down into lard, which you can use as a cooking fat, or as the fat needed for carnitas or confit
Instructions
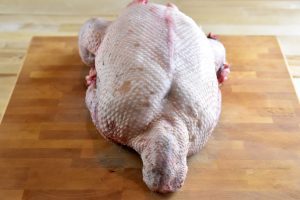
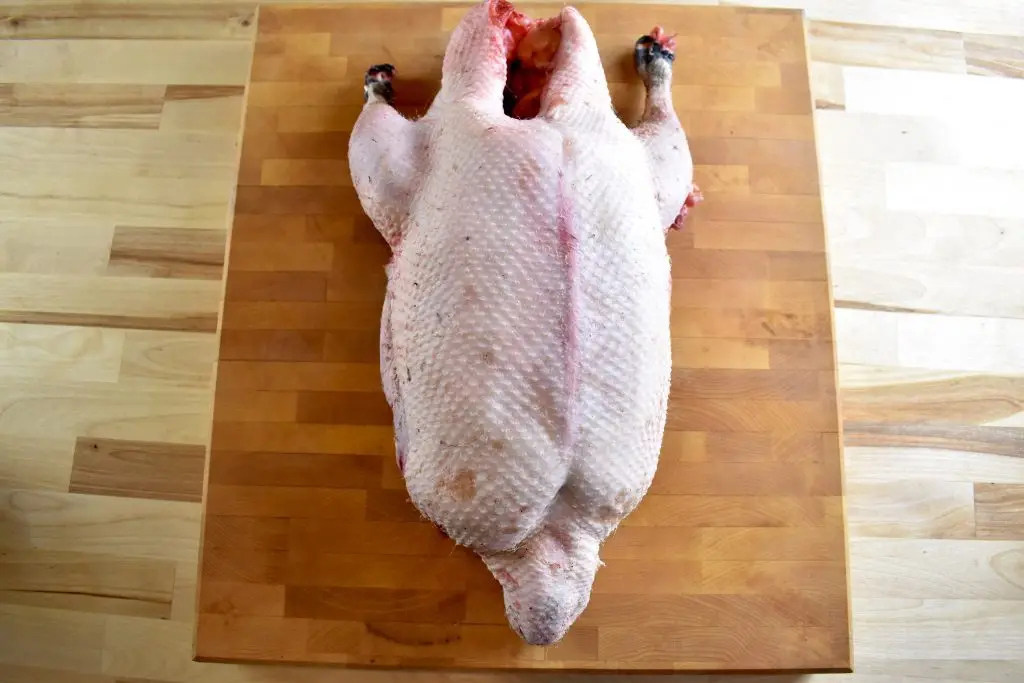
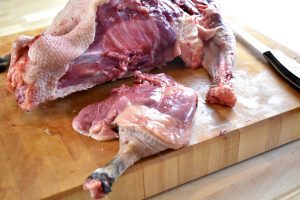
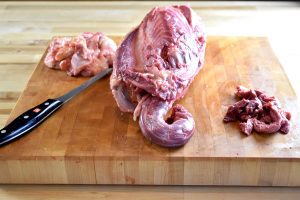
Place plucked, gutted, and cleaned goose on cutting board, breast side up.
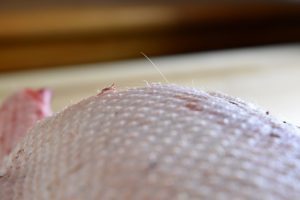
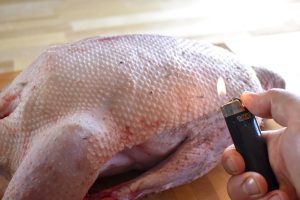
Even if you’ve done a great job plucking, there are likely to be ‘hairs’ left over where the feathers came out. Put the bird between yourself and a bright light to see them all. Use a long match, taper, candle, lighter, or cook’s torch to burn off all of the hairs you can see. They tend to collect heavily around the neck, under the wings, and along the spine.
While you are dismantling the goose, keep your eyes open for any shot that may be in the bird. If you see holes, dig inside to see if you can find any shot or feathers pushed into the meat. Use your fingers to press into soft parts to feel for irregularities. No one like biting down on steel!
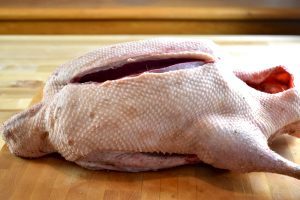
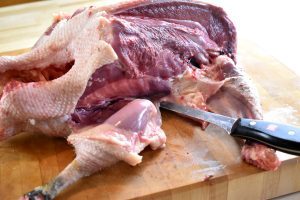
With the bird sitting breast up on the cutting board, use your fingers to find the keel bone. That is the hard bone jutting down the middle of the bird between the two breasts.
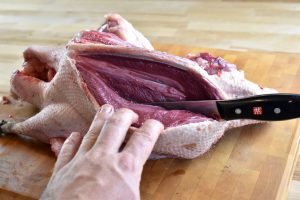
Using a sharp boning or fillet knife, cut along one side of the keel bone, staying as close as you can to the bone. You want to firmly slice your way through the skin, then make long, sliding shallow cuts, keeping the side of your knife pressing against the rib bones.

Continue cutting the breast out, using the same long, quick, shallow cuts, trying your best to get as much of the meat to stay attached to the breast as possible.
Move your attention towards the leg. You’ll notice a clean separation between the thigh muscle and the breast, with only skin and membrane holding them together. Gently slice through, following the natural lines. The meat will guide you! Cut down to the cutting board, the move your attention towards the wing joint.
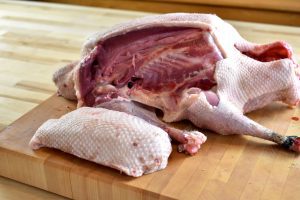
Keep making small incisions towards the front of the bird. Here you will come up to the breast bone or wish bone. I find it easiest to cut down along the outside of this bone, then go back in later for the leftover bits. Underneath the breast bone, you’ll come across the wing joint. Cut down around the outside of the joint and to the cutting board. The breast should be mostly detached now. Make any more necessary cuts to completely detach it. Set it aside.
Now repeat on the other side of the goose.
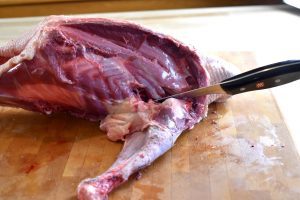
Time for the legs. Grab a hold of one of the legs and give it a wiggle to get a sense of where the main muscle is located.
Grab the leg and gently pull outwards while you take your knife and start making shallow, smooth slices starting at the top of the leg towards the tail end and pulling back towards where the breast was. The leg muscle is already pretty separate from the ribs and hip, so you don’t want to be cutting through too much meat, mostly skin and membrane.
Keep making small incisions, staying close to the ribs/hip bones so you don’t lose much meat. The leg will begin to naturally fall to the cutting board. Now cut the skin holding the thigh to the wing (close to your cutting board), making sure not to lose any of the skin on the actual thigh.
Continue cutting until you reach the hip joint. You won’t be able to see much of it yet, but you will feel its hard presence under your knife.
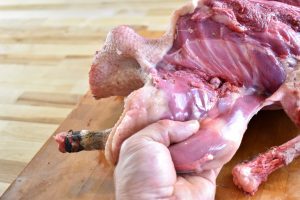
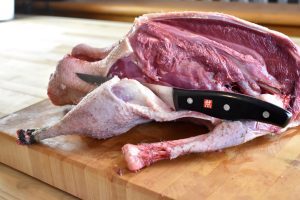
Slide your fingers under the leg and thigh, grasping the top with your thumb. Use your other hand to hold down on the keel bone of the carcass. Now firmly pull down on the leg while pushing against the carcass until you feel and see the joint pop. It will come partially out of its socket. Your knife will finish the job.
To make separating the joint easier, you can first keep cutting past the joint, following close to the hip bone, making your way towards the tail. There is a lump of meat here you can try to incorporate into the leg, but if you miss it, that’s okay. Keep making shallow incisions down towards the cutting board until you slice through the skin.
Now that the joint has popped and the leg is laying down on the cutting board, use your knife tip to explore the socket, cutting away any sinews or tendons holding the joint in place. Keep at this, wiggling the leg with your other hand, until the joint is fully separated from the socket.
Once the joint has been separated, make any final incisions necessary to completely separate the leg from the carcass. Try to keep as much meat and skin attached as possible when cutting away the leg, you can trim it up afterwards, but you can’t re-attach lost skin!
Now repeat the same process on the other leg.
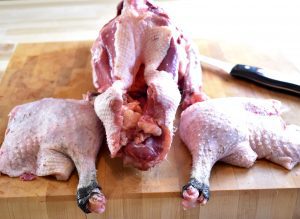
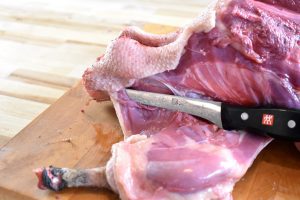
Now it’s time to separate the wings. Hold onto the keel bone with one hand and use the other to wiggle the wing around. This will give you a sense of where the joint and muscle groups are. Holding the wing down, get your knife point into where you feel the joint is. Start exploring around the area, cutting away any tendons and sinews in and outside the joint. Use quick little sharp motions repeatedly with the knife tip to separate this joint. Keep taking little breaks to wiggle the wing around and reacquaint yourself to where the joint is exactly.

Grasping the wing, firmly press your knife through any remaining connections in the joint. Now start slicing down towards the neck with your knife edge facing away from you, following the rib cage down to the cutting board. Now do the other side, following the ribcage down towards where the thigh was. Pulling the wing towards you, make any final slices necessary to completely separate the wing from the carcass. Use long, shallow, gliding slices here.
Now repeat on the other side.
If you happen to find clumps of fat under the wing, you can trim that off and set it aside for rendering.
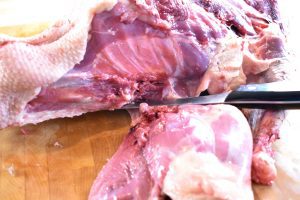
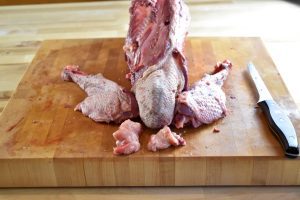
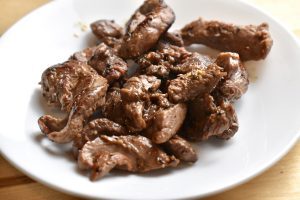
Now go over the carcass and slice away any large-ish chunks of meat you may have missed with your knife tip. There will probably be a fair amount of meat attached to the keel bone and also inside the breast bone area. Doing this is more for a little treat than anything (see step 15), so you can skip this part if you want to.
Do the same thing with all of the skin and fat left on the carcass. There should be fat located inside the bird, on either side of the tail. You can use your fingers to pull all of this out. Use your knife to make small incisions, getting under any skin you find. Once you’re under it a bit, grasp the cut section with your fingers, pulling upwards, and use the knife to keep slicing away underneath until the whole patch has lifted and can be removed.
Trim up the breasts and legs, removing any visible irregularities in the form of meat or fat poking out off of the main piece.
You can now go back over the individual pieces with a lighter or torch to take care of any feather hairs you’ve missed. Also, feel around for any shot you may have missed.
From here you can individually wrap or bag each piece for the freezer, break them down into smaller pieces, or begin cooking with them!
That was a lot of work, you deserve a break and a treat! Take all of those meat scraps and generously season them with salt and pepper. Fry on high heat in a little bit of oil until medium or pink in the centre. Have yourself a nice little snack before moving on to the broth and lard!
Now for the broth
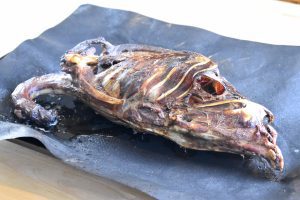
Pre-heat your oven to 400°F (200°C, gas mark 6).
Put the goose carcass on a baking tray and roast for 30 minutes or until dark golden brown all over.
Put it into a large pot (you may have to break it down into pieces so it will fit) and cover with cold water.
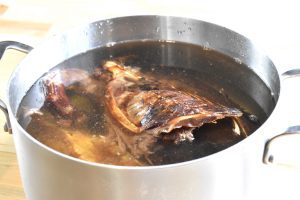
Slowly bring to a simmer on medium heat, then turn to low and let it simmer slowly (that’s a couple bubbles a second, not a rolling boil!) for several hours. I would go at least 2, but would aim for 4. Top up with more water, if you feel like it’s getting way too low.
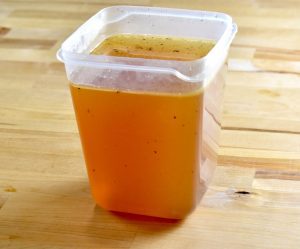
After you’ve simmered for several hours, pour the liquid through a strainer to catch any stray bones or scraps. You’ll end up with this beautiful golden stock, which you can use now, keep in the fridge for 3 days, or put in the freezer for several months.
Now for the lard
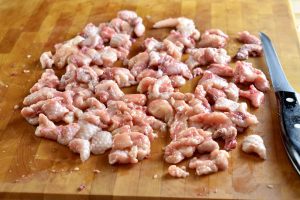
Take all of the pieces of fat and skin and put them on the cutting board. Using a sharp knife, cut them into chunks that are less than 1 inch (2cm) square.
Put the pieces of fat in a frying pan and add 3/4 cup of cold water.

Cook over very low heat. The water will eventually evaporate (and may cause some spitting and hissing), leaving the rendered fat to continue cooking the pieces, rendering more and more liquid fat from them until they are spent.
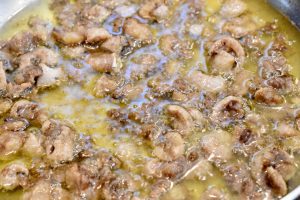
After a couple hours of cooking over low, the fat pieces will have become crispy little dark bits. If they don’t seem like they’re giving up any more liquid fat, you can turn off the heat and let the fat cool.
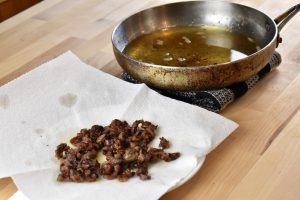
Remove the crunchy bits with a slotted spoon and either discard, or let drain on paper towels to be used in a recipe (some classic French charcuterie recipes use them) or to be eaten as a snack.
Pour the cooled fat through a strainer or cheesecloth into a container (mason jars work great!).
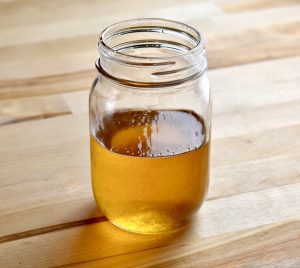
Look at that liquid gold!
Keep the fat in a covered container in the fridge, where it will last for months and months.
That's it!
Now that you’ve dealt with your goose, it’s time to put your hunting gear back on and head out to get some more!
*Canada geese can look VERY different from one goose to the next!