How to: Preparing a Whole Bass

This is my method for preparing fresh fish that I’ve caught for dishes using a whole fish, or if I’m planning on freezing it.
This method works especially well for large- and smallmouth bass, but you could also use it for pretty much any panfish, as well as perch (and for a multitude of ocean fish).
Once you get the hang of this, you should be able to complete a whole fish in less than 10 minutes, using just shears for smaller fish, or a combination of shears and a fillet knife for slightly larger fish.
From there you can steam, roast, barbecue, grill, deep fry, panfry, shallow fry, simmer, or freeze your fish!
- 1 bass, crappie, sunfish, or perch
Preparation
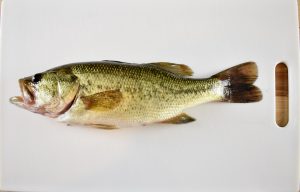
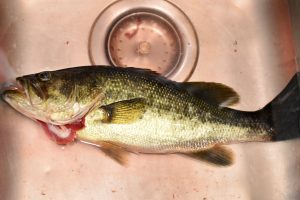
Start with a whole fish, live or previously dispatched.
If you haven’t already, you’re going to want to quickly and painlessly dispatch your fish.
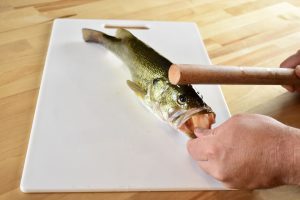
Grasp the bass by the lip or by the back (be sure to stroke the fish from the head to the tail, thereby folding the spiky fins safely so you don’t poke yourself on them when grabbing by the back).
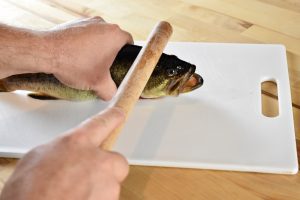
Using a stick, rolling pin, specially made tool, or whatever hefty device you can find, grab the fish firmly, then give it one good whack over the skull, right behind the eyes. The fish should stiffen and vibrate. I like to give it another whack or two at this point just to be completely sure it is dead.
The fish will likely keep moving a bit after it is dead due to nerves. I’ve pulled beating hearts out of fish long minutes after they’ve been completely killed and dismantled. This can be disconcerting, but don’t be alarmed.
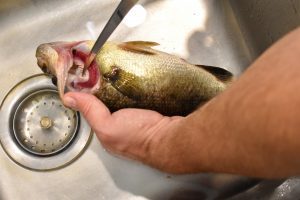
Immediately after killing the fish, use shears or a knife to cut through both sets of its gills (lift the gill plate, gather the gills and cut through them, careful they can be sharp!) then plunge it into cold water and leave it there for a few minutes.
Doing this will drain some of the blood out of the fish, making for tastier meat. The reason you put it in water is to let the blood flow without coagulating.
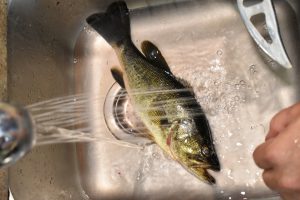
After a few minutes, drain the water and rinse the fish.
Now it is time for scaling. If scaling inside, I like to fill the sink with some water and perform the scaling under water. This ensures that scales don’t fly all over your kitchen or working space.
You can use any sort of scaling tool, I like this one:
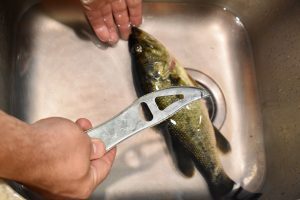
but you can use whatever you’ve got, whether it is some bottle caps tacked to a stick, or even the back of your fillet knife.
To scale, grasp the fish firmly (being careful of spiky fins) and start at the tail, moving up towards the head.
Draw the scaler towards the head, which should bend the scales backwards then pop them off. Use long, slow strokes, then go back over the area with short, sharp strokes.
Keep scaling until you’ve gotten to the head. Make sure you get the belly, back, and around the fins.
I like to scale along the top of the head and over the cheeks as well, but that is optional.
Now flip the fish and do the other side as well.
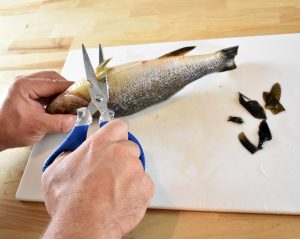
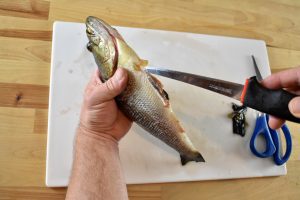
Give the scaled bass a rinse, then place on a cutting board.
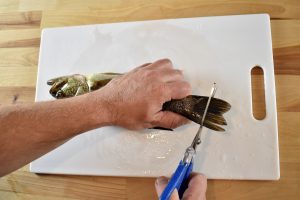
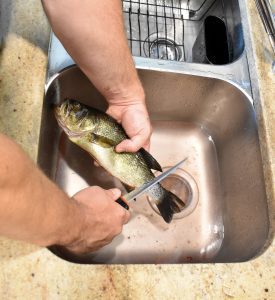
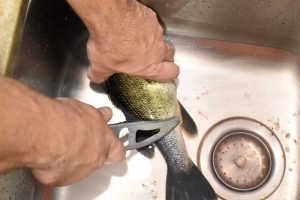
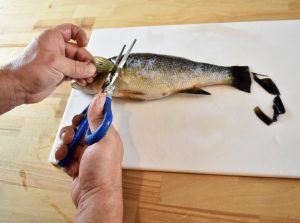
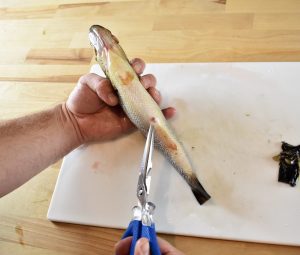
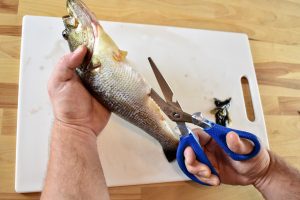
Using scissors, fish shears, or a good fillet knife, begin cutting off all of the fins, starting with the tail fin, which I cut off halfway. Continue with the rest of the fins, pulling them up and cutting them off at the base of each.
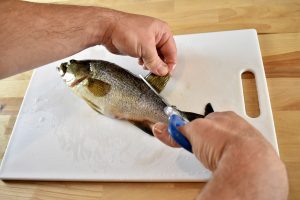
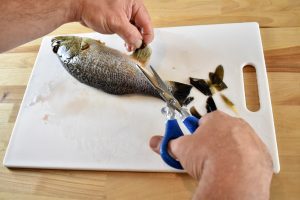
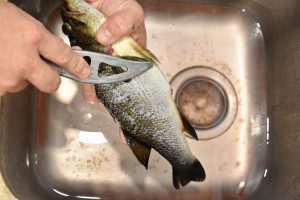
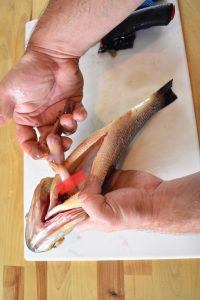
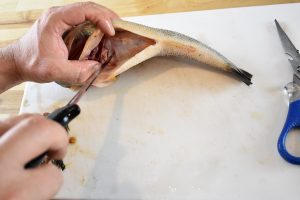
Now locate the anus on the bottom of the fish.
Using your shears or a knife, start the blade in the hole and begin cutting towards the ‘chin’, with the blade facing upwards towards the skin.
I prefer using a knife on larger fish.

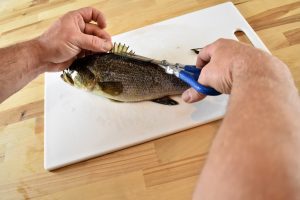
Slice the belly open, being careful not to slice open all of the organs. It doesn’t really matter if you do, but it’s less messy if you don’t. They’ll push up out of the incision as you move your way upwards.
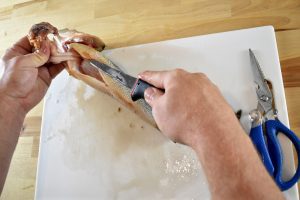
Once you get to the pelvic fins, you’ll encounter a hard bony plate. Cut through the middle of this and continue up towards the chin.

Once you get to where the belly skin comes to a point behind the chin, you can stop cutting.
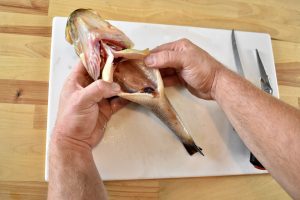
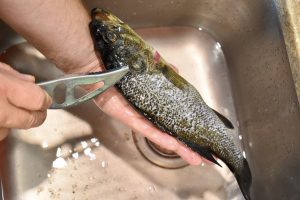
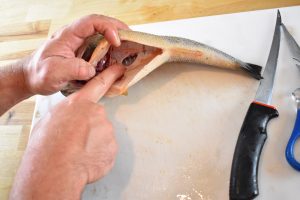
Now you can open up the belly cavity to see all of the organs.
Jam two fingers down the side of the belly cavity and under the organs.
Use those fingers to gently grasp and pull the organs out of the cavity. They’ll still be attached at the chin and anus.
The intestine can easily be yanked or cut to be separated from the anus, but the esophagus coming out of the head will probably need to be cut where I drew the red line in the picture.
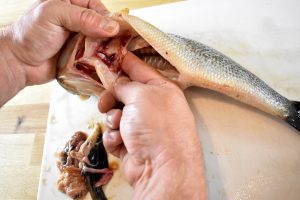
Pulling the guts upward, use your knife or scissors to cut through the esophagus to separate the guts from the fish.
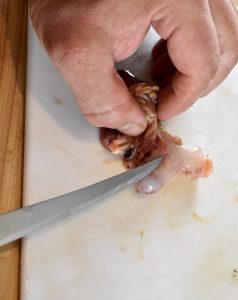
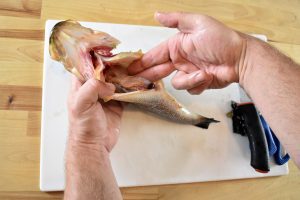
This is the fish’s stomach. If you’re not too squeamish, it’s a good idea to cut it open. This allows you to see what that bass was eating, which may influence what types of lures you use to catch these fish in the future.
This bass had a half-digested fish in its stomach. I’ve pulled out crayfish, insects, fish, and even have heard of people finding baby turtles and mice!
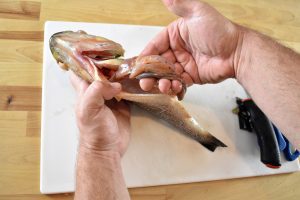
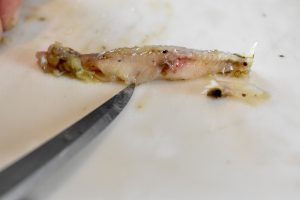
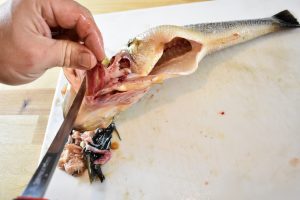
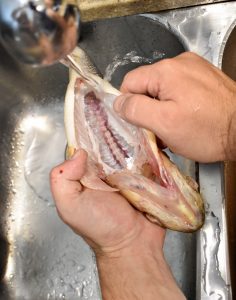
Rinse off your knife, then open the fish back up to find the swim bladder, a white balloon-like organ attached to its upper spine and ribcage. This organ allows the fish to float and swim at different depths.
Puncture the swim bladder by poking a hole into it, then use your fingers to rip it all out. It’s not too important to get every little piece, just pull the majority out.
While you’re up in there, find the diaphragm, heart, and anything else still attached and pull them out too.
Now open up the gill plates and use your shears or knife to carefully cut out the gills. They can be sharp and rough on the fingers, so be careful. Cut them off as close as possible to the skin, then yank them off the fish. Pliers would work well in this situation if you don’t want to use your fingers.
Gills can leave a bitter off-flavour if left on, so it’s best to remove them.
Give your fish a really good rinse with cold water inside and out, then pat dry with paper towels.
Dispose of the fins, gills, and guts.
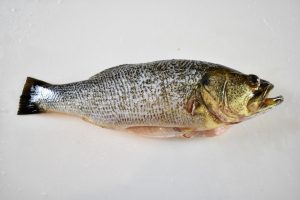
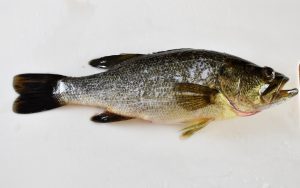
There you go, you’ve successfully prepared a fish for any method using a whole fish, whether it be grilling, frying, steaming, simmering, or panfrying!
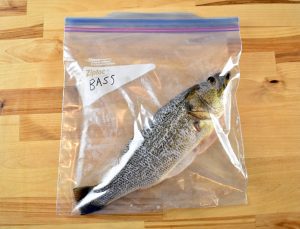
I usually do up fish like this when I’m going to freeze them. From there I can defrost them and cook them whole, or fillet them, or whatever I need to do to them to make the dish I want.
There is certainly more than one way to prepare a fish, but this is my method. I hope you try it out for yourself!